
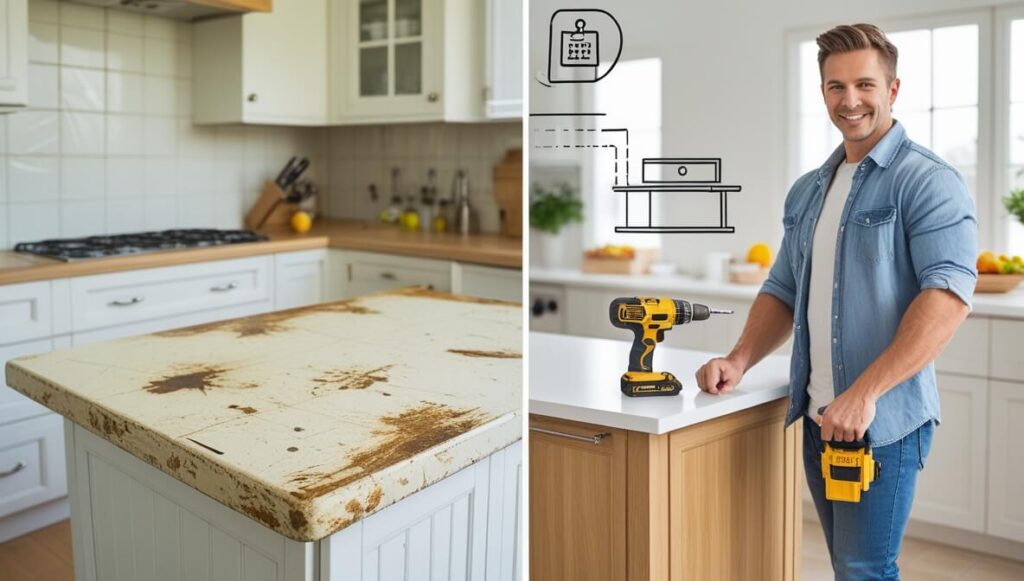
Thinking about upgrading your kitchen but don’t want to spend thousands on professional installation? You’re not alone! According to HomeAdvisor’s 2024 countertop cost guide, the average cost of professional countertop installation ranges from $1,800 to $4,200 — but DIY enthusiasts can cut that cost by up to 70%! I’ve been through the countertop replacement journey myself, and I’m excited to share everything I’ve learned about transforming your kitchen with your own two hands. From selecting the right materials to adding those finishing touches, this guide will walk you through the entire DIY countertop replacement process. Ready to roll up your sleeves and create the kitchen of your dreams? Let’s dive in! From simple refreshes to total transformations, unlock expert techniques for kitchen excellence in our comprehensive 2025 Kitchen remodelling guide.
Why Consider a DIY Countertop Replacement?
Significant Cost Savings
Professional countertop installation typically costs between $1,800 and $4,200, with labor accounting for 20-30% of the total price. By handling the installation yourself, you can save anywhere from $500 to $1,200 or more, depending on the size of your kitchen and the materials chosen. This savings allows you to either keep your budget lower or potentially upgrade to higher-quality materials within the same budget.
Personal Satisfaction and Pride
There’s an immense sense of accomplishment that comes from successfully completing a major home improvement project. Every time you prepare a meal or entertain guests in your kitchen, you’ll experience the pride of knowing you transformed the space with your own skills and effort. This personal connection to your home creates a deeper appreciation for the space and can be incredibly rewarding.
Dramatic Kitchen Transformation
Countertops typically account for about 10% of the visible surface area in a kitchen but make up about 40% of the visual impact. Replacing dated, worn, or damaged countertops can completely revitalize your kitchen’s appearance without the need for a full renovation. A well-chosen countertop can make cabinets look newer, brighten the space, and create a more modern aesthetic with relatively minimal intervention.
Wide Range of DIY-Friendly Materials
Today’s market offers numerous countertop options specifically designed with DIY installation in mind. From pre-cut laminate countertops and modular butcher block sections to tile kits and concrete mixes formulated for countertop applications, manufacturers have recognized the growing DIY market and created products that balance quality with ease of installation.
Realistic Timeframe Expectations
A complete DIY countertop replacement can typically be accomplished over a long weekend or two. Most homeowners can remove old countertops in 2-4 hours, prepare cabinets in 1-2 hours, and install new countertops in 4-8 hours, depending on complexity and material. Factor in additional time for sealing, curing, and installing fixtures, and you’re looking at a total project time of 2-3 days of active work, making it ideal for a weekend warrior project.
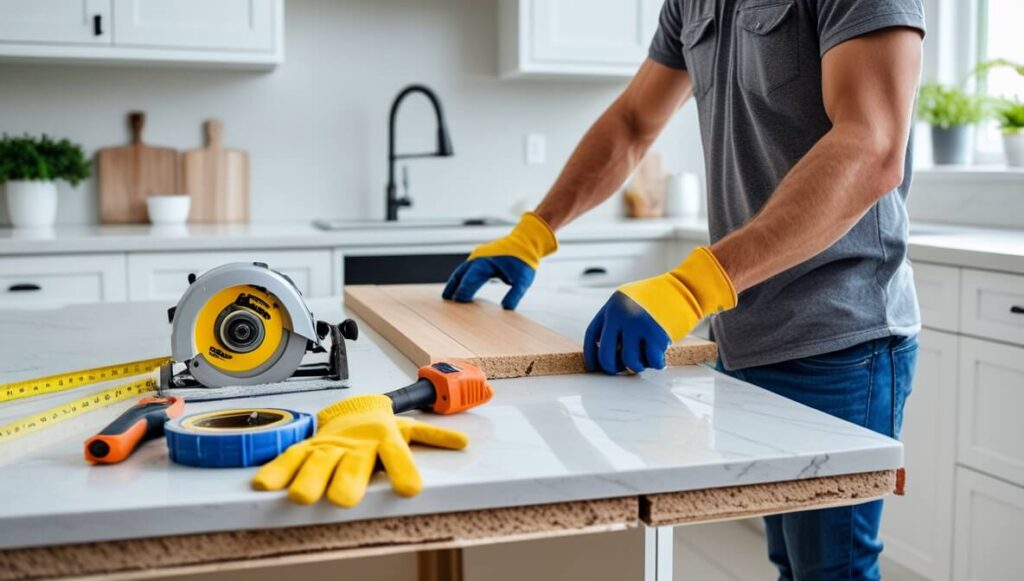
Essential Tools and Materials for Countertop Replacement
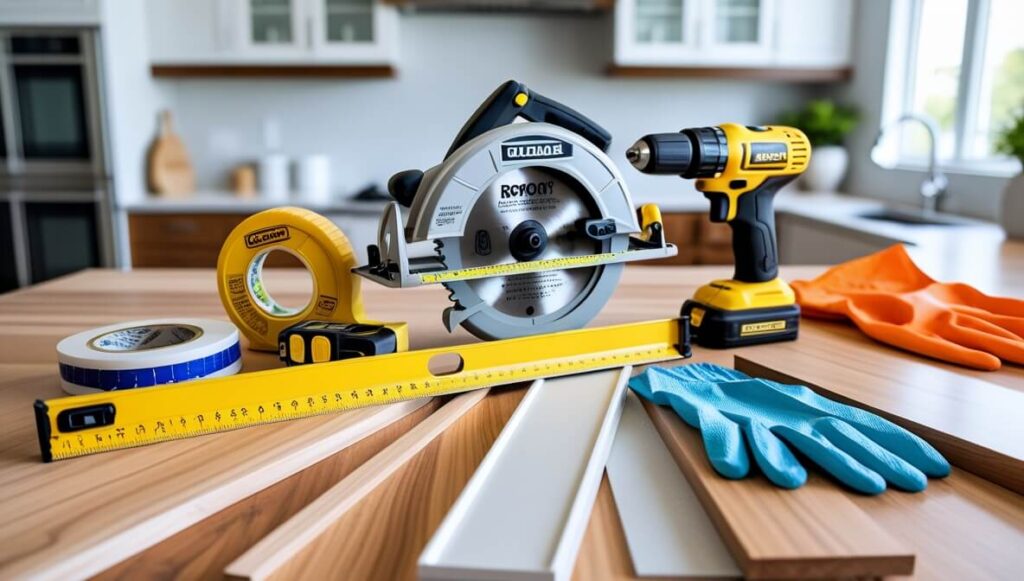
Must-Have Tools
- Measuring Tools: Tape measure, carpenter’s square, level (2-foot and 4-foot recommended)
- Cutting Tools: Circular saw with appropriate blades (carbide-tipped for laminate, diamond for stone), jigsaw for intricate cuts, coping saw for detailed work
- Power Tools: Drill/driver with various bits, router with laminate trim bit (for laminate countertops)
- Hand Tools: Screwdrivers (Phillips and flathead), adjustable wrench, utility knife, pry bar, rubber mallet
- Clamping Tools: C-clamps, bar clamps for securing pieces during installation
- Specialty Tools: Countertop seam setter for joining sections, hole saw kit for faucet holes
Materials Needed by Countertop Type
- Laminate: Laminate sheets or pre-formed countertops, contact cement, laminate trim, edge banding
- Butcher Block/Wood: Butcher block slabs, wood conditioner, food-safe oil or sealant, wood screws
- Tile: Cement board substrate, mortar, tiles, grout, grout sealer, edge trim pieces
- Concrete: Concrete mix designed for countertops, reinforcement mesh, concrete sealer, form materials (melamine, silicone for edges)
- Solid Surface: Pre-cut solid surface material, specialized adhesive, polish kit
Safety Equipment
- Eye Protection: Safety goggles that fully enclose around the eyes
- Respiratory Protection: N95 dust masks for basic cutting, respirator with appropriate filters for adhesives and sealants
- Hand Protection: Work gloves for handling rough materials, cut-resistant gloves for working with sharp edges
- Hearing Protection: Earplugs or earmuffs when operating power tools
- Workspace Protection: Drop cloths, painter’s tape, plastic sheeting to protect surrounding areas
Where to Rent Specialized Tools
- Home improvement centers like Home Depot and Lowe’s offer tool rental programs for specialized equipment like wet saws or heavy-duty circular saws
- Local tool rental shops often provide better rates for weekend rentals
- Consider community tool libraries in many cities that offer low-cost borrowing options
- Online rental services with delivery and pickup options like Rent-a-Tool or ToolBarn
- Neighbor-to-neighbor rental platforms like Sparetoolz or Rent My Equipment
Budget Planning for Tools and Materials
- Entry-Level Budget ($300-$700): Laminate countertops with basic tools
- Mid-Range Budget ($700-$1,500): Butcher block or tile countertops with quality tools
- High-End DIY Budget ($1,500-$3,000): Solid surface or concrete countertops with professional-grade tools
- Tool Investment Strategy: Purchase quality versions of tools you’ll use repeatedly, rent specialized tools needed only for this project
- Materials Cost Breakdown: Typically 70-80% for countertop materials, 10-15% for adhesives/fasteners, 10-15% for finishing materials
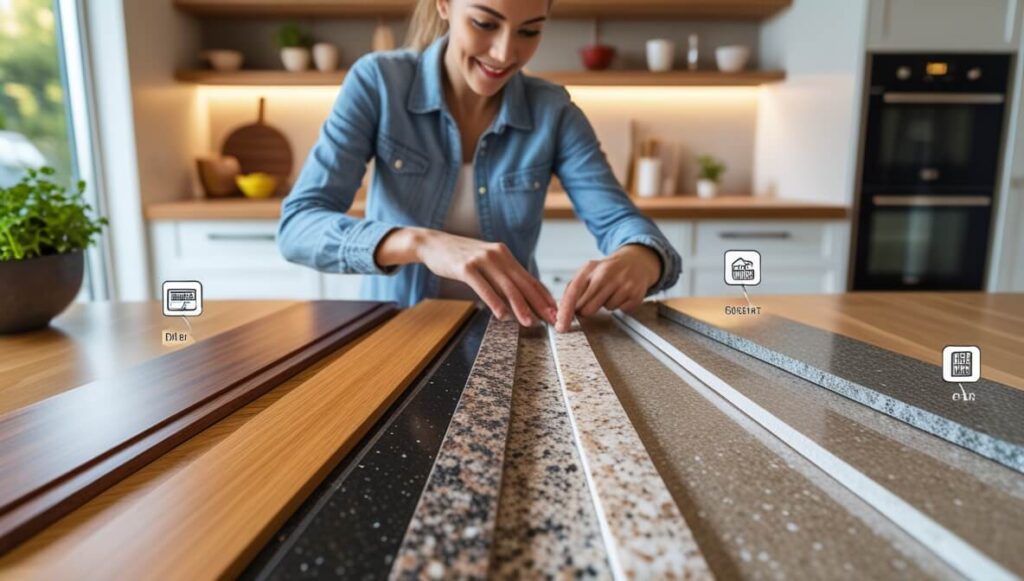
Choosing the Right Countertop Material for Your DIY Project
DIY-Friendly Countertop Materials Comparison
Laminate
- Difficulty Level: Beginner to intermediate
- Durability: 10-15 years with proper care
- Maintenance: Low (clean with mild soap and water)
- Cost: $15-$40 per square foot installed DIY
- Pros: Affordable, wide variety of designs, lightweight, easy to cut
- Cons: Can be damaged by heat, visible seams, difficult to repair if damaged
Wood/Butcher Block
- Difficulty Level: Intermediate
- Durability: 20+ years with proper maintenance
- Maintenance: Moderate (requires regular oiling/sealing)
- Cost: $30-$60 per square foot installed DIY
- Pros: Warm aesthetic, can be sanded and refinished, naturally antibacterial (when properly maintained)
- Cons: Susceptible to water damage, requires regular maintenance, can dent or scratch
Tile
- Difficulty Level: Intermediate
- Durability: 20+ years
- Maintenance: Moderate (grout requires regular cleaning and resealing)
- Cost: $20-$50 per square foot installed DIY
- Pros: Heat resistant, wide design options, damaged tiles can be individually replaced
- Cons: Uneven surface, grout lines can stain, installation is time-consuming
Concrete
- Difficulty Level: Advanced
- Durability: 20+ years
- Maintenance: Moderate to high (requires regular sealing)
- Cost: $40-$75 per square foot installed DIY
- Pros: Completely customizable, heat resistant, unique appearance
- Cons: Heavy, prone to cracking if not properly reinforced, lengthy curing process
Guidance for First-Time DIYers
For your first countertop installation project, laminate and pre-cut butcher block offer the most forgiving experiences. Laminate is lightweight and can be cut with standard woodworking tools, while butcher block provides a natural material that can be easily sanded if mistakes occur. Avoid concrete for first-time projects, as the mixing, pouring, and finishing processes require significant skill to achieve professional results.
Pre-Cut vs. Custom Sizing Options
- Pre-Cut Advantages: Straight factory edges, consistent thickness, often comes with pre-attached backsplash, simplified installation
- Custom Sizing Advantages: Exact fit for unusual spaces, fewer seams, ability to accommodate unique layouts
- Decision Factors: Kitchen complexity, comfort with precise measurements, availability of appropriate cutting tools
- Hybrid Approach: Consider pre-cut sections for straight runs and custom cuts only where necessary for complex areas
Complementing Existing Kitchen Design
- Cabinet Coordination: Choose countertop colors/patterns that either complement or purposefully contrast with cabinet finishes
- Backsplash Consideration: Select materials that work with existing backsplash or plan for a new backsplash installation
- Lighting Impact: Darker countertops absorb light and may make small kitchens feel smaller; lighter countertops reflect light
- Appliance Matching: Consider how the countertop material will look against your appliance finishes
- Design Longevity: Trendy patterns may look dated more quickly; consider more timeless options for long-term satisfaction
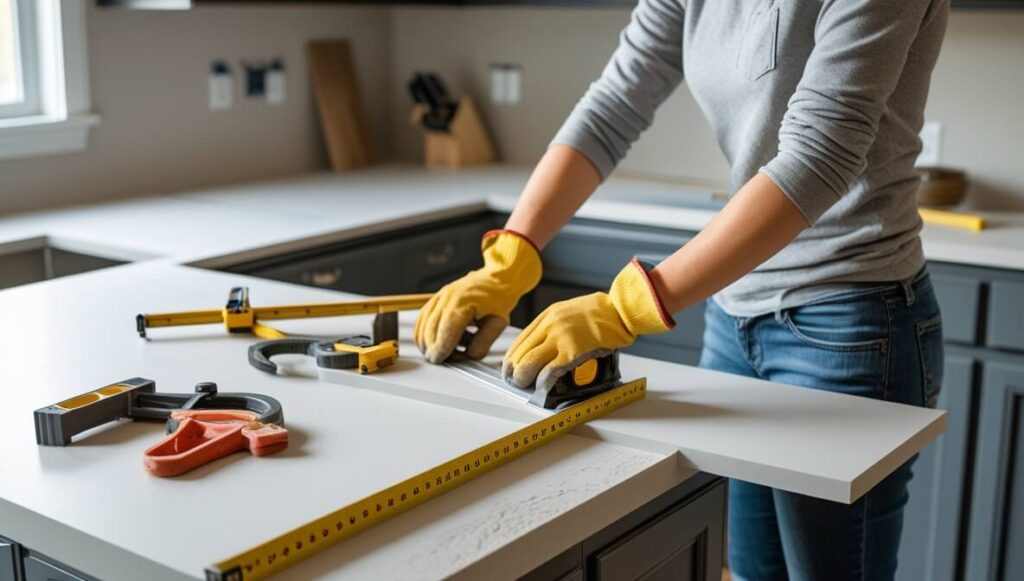
How to Measure and Plan Your Countertop Replacement
Accurate Measurement Techniques
- Gather Necessary Tools: Tape measure, carpenter’s square, paper, pencil, and camera
- Create a Basic Layout: Draw a rough sketch of your kitchen layout, labeling each cabinet section
- Measure Depth: Measure from the wall to the front edge of the existing countertop (typically 25-26 inches)
- Measure Length: Measure each section of countertop separately, breaking at corners or appliances
- Double-Check: Take each measurement at least twice, working with a helper if possible
- Document Everything: Record all measurements on your sketch, including locations of sinks, cooktops, etc.
- Photo Documentation: Take photos of each section, especially complex areas, for reference during planning
Creating Templates for Complex Layouts
- Materials Needed: Kraft paper, cardboard, or hardboard; tape; pencil; scissors or utility knife
- Wall Contour Capture: For areas against walls, use a contour gauge to capture the exact wall profile
- Full-Size Template Creation: Cut template material to the rough dimensions, then place on the existing countertop. For detailed template-making techniques, the Family Handyman’s guide to countertop templates
- Trace Exact Dimensions: Trace the exact shape, including cutouts and edges
- Mark Important Features: Note locations of seams, sinks, faucets, and appliances on the template
- Test Fit: Cut out the template and test it in place, making adjustments as needed
- Label Templates: Clearly label each template section with location and orientation
Accounting for Fixtures and Appliances
- Sink Measurements: Measure the exact dimensions of your sink and its location relative to the countertop edges
- Faucet Placement: Mark the center points for faucet holes, typically 4 inches behind the sink
- Cooktop/Range Clearance: Allow for manufacturer-recommended clearance around cooktops (typically 2-3 inches)
- Dishwasher Height Consideration: Ensure countertop height allows for dishwasher installation (typically 34.5 inches from floor)
- Refrigerator Clearance: Check that countertop depth allows refrigerator doors to open properly
- Electrical Outlet Location: Note locations where countertop might interfere with existing outlets
Calculating Overhangs and Edge Treatments
- Standard Overhangs: Front edge typically extends 1.5 inches beyond cabinet faces
- Island Overhangs: For seating areas, allow 10-12 inches of overhang (with proper support)
- Edge Treatment Allowance: Different edge treatments require different amounts of material:
- Bullnose: Add 1 inch to depth
- Beveled: Add 3/4 inch to depth
- Waterfall: Add full height of cabinet end to material calculations
- Corner Treatments: Decide between mitered corners (45-degree angles) or squared butt joints
- Support Requirements: Overhangs greater than 6 inches require additional support brackets every 24 inches
Common Measurement Mistakes to Avoid
- Assuming Square Corners: Most kitchen corners aren’t perfectly square; measure actual angles
- Ignoring Wall Irregularities: Walls are rarely straight; account for bumps and curves
- Forgetting About Appliance Clearance: Always leave manufacturer-recommended clearance around appliances
- Miscalculating Material Quantity: Add 10% to total material calculations for waste and mistakes
- Overlooking Height Variations: Check cabinet heights at multiple points; they may not be perfectly level
- Neglecting Expansion Space: For wood countertops, allow 1/8-inch gap between countertop and walls for expansion
- Improper Seam Placement: Plan seams over cabinet supports, not over open spaces
Removing Your Old Countertops Safely
Disconnecting Plumbing Fixtures
- Shut Off Water Supply: Locate and turn off water valves under the sink
- Drain Lines: Open faucets to drain remaining water from lines
- Disconnect Supply Lines: Use an adjustable wrench to loosen supply line nuts connecting to faucet
- Remove Drain Assembly: Loosen P-trap connections and remove drain assembly
- Disconnect Disposal: If present, turn off power, disconnect wiring, and remove mounting assembly
- Document Connections: Take photos of all plumbing configurations before complete disassembly
- Cap Lines If Needed: If replacement will take multiple days, consider capping water lines
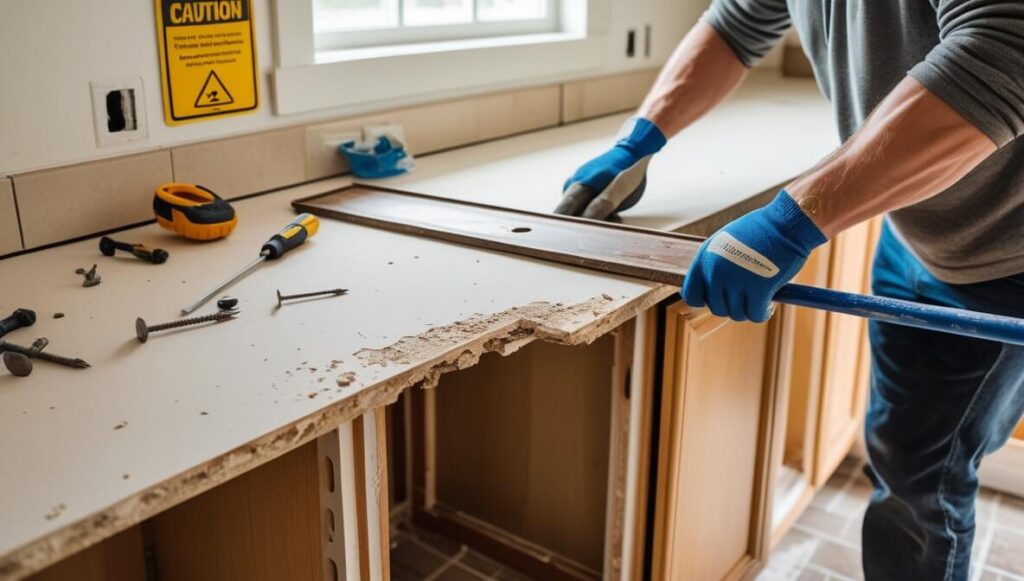
Removing Existing Countertop
- Clear and Prepare Area: Remove items from countertops and cabinets below work area
- Identify Attachment Method: Look under countertop to see if it’s screwed, glued, or both
- Remove Backsplash First: If separate from countertop, remove backsplash by cutting caulk and prying gently
- Locate Fasteners: Find any screws securing countertop to cabinets, typically from underneath
- Cut Caulk/Adhesive: Use a utility knife to cut through any caulk or adhesive along walls
- Break Adhesive Bond: For glued countertops, use a putty knife or thin pry bar between countertop and cabinet
- Lift Carefully: With fasteners removed, lift countertop straight up with a helper
- Segment If Necessary: For large countertops, consider cutting into manageable sections before removal
Proper Disposal or Recycling
- Local Regulations: Check local regulations regarding disposal of different countertop materials
- Recycling Options:
- Laminate: Some specialized facilities can recycle laminate countertops
- Stone: Local stone fabricators may accept granite or marble for repurposing
- Wood: Can be repurposed for smaller projects or composted if untreated
- Concrete: Can be crushed and used as aggregate for other projects
- Donation Possibilities: Consider donating usable countertops to habitat for humanity or similar organizations
- Waste Management Services: Many waste management companies offer special pick-up for construction materials
- DIY Transport: Break down materials to fit in personal vehicle for transport to recycling center or landfill
Protecting Surrounding Surfaces
- Floor Protection: Cover floors with heavy-duty drop cloths or cardboard
- Cabinet Protection: Apply painter’s tape along cabinet edges to prevent scratches
- Dust Containment: Use plastic sheeting and painter’s tape to create dust barriers in open doorways
- Ventilation Considerations: Cover HVAC vents to prevent dust circulation throughout home
- Fixture Protection: Cover nearby fixtures with plastic to prevent damage during removal
- Workspace Organization: Designate specific areas for tools and removed materials to prevent trips and falls
- Utility Protection: Mark locations of any electrical or plumbing lines that could be damaged during removal
Troubleshooting Unexpected Issues
- Stubborn Adhesive: Apply heat using a heat gun on low setting to soften stubborn adhesive
- Hidden Fasteners: Check inside corner braces and along the entire perimeter for hidden screws
- Integrated Backsplash: For countertops with integrated backsplash, cut along the wall joint with an oscillating tool
- Damaged Cabinets: Address any water damage or structural issues discovered during removal
- Wall Damage: Repair any wall damage before installing new countertops
- Uneven Cabinet Tops: Note areas where cabinet tops are uneven for addressing during preparation
- Unexpected Plumbing/Electrical: If you discover non-standard plumbing or electrical configurations, consult professionals before proceeding
Preparing Your Base Cabinets for New Countertops
Assessment and Cabinet Repair
- Structural Inspection: Check cabinet frames for stability, focusing on corners and joints
- Water Damage Evaluation: Look for swelling, discoloration, or softness indicating water damage
- Corner Bracing: Verify corner cabinets have adequate bracing to support countertop weight
- Drawer Operation: Ensure drawers open and close properly without interference
- Cabinet Top Condition: Inspect cabinet tops for damage that could affect countertop installation
- Repair Methods:
- Loose joints: Reinforce with corner brackets or wood glue and clamps
- Damaged areas: Replace damaged wood sections or fill with wood filler
- Weak frames: Add 2×4 supports inside cabinets along top edges
Ensuring Level and Secure Cabinets
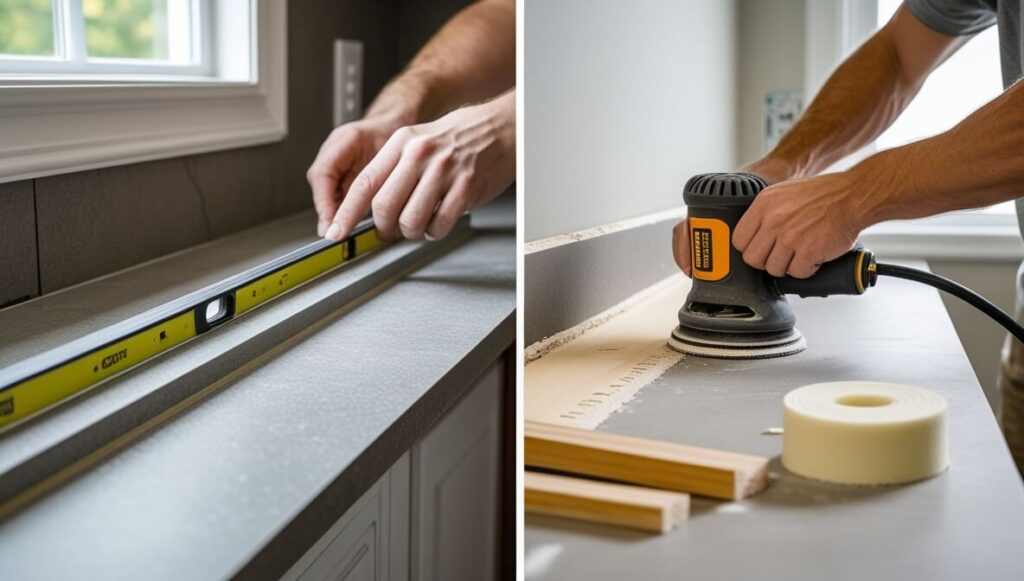
- Check Overall Level: Place a 4-foot level across multiple cabinets to check for high or low spots
- Individual Cabinet Level: Check each cabinet individually in both directions (front-to-back and side-to-side)
- Cabinet-to-Cabinet Height: Verify all adjacent cabinets are at the same height
- Shimming Technique:
- Use cedar shingles or plastic shims under cabinet bases
- Place shims at cabinet corners and midpoints of longer runs
- Secure cabinets to wall studs after leveling
- Cabinet Fastening: Ensure all cabinets are securely fastened to walls and to each other
- Door and Drawer Adjustment: Adjust hinges and drawer slides as needed after leveling
Installing Additional Support
- Weight Considerations: Different materials require different levels of support:
- Laminate: Standard cabinet construction is usually sufficient
- Solid wood: Support every 24 inches
- Stone/concrete: Support every 18 inches and at all seams
- Overhang Support: For overhangs greater than 6 inches:
- Install steel brackets every 24 inches
- Consider corbels for decorative and functional support
- For extensive overhangs, install leg supports
- Seam Support: Add additional bracing directly under planned seam locations
- Corner Support: Reinforce inside corners with additional bracing
- Dishwasher Spans: Add steel support bars across dishwasher openings
- Sink Area Reinforcement: Double up support around sink cutouts where structure is compromised
Addressing Uneven Walls or Cabinets
- Wall Gap Solution: For gaps between countertop and wall:
- Small gaps (under 1/4 inch): Can be filled with caulk
- Larger gaps: May require scribe molding or backsplash to conceal
- Scribe Fitting Technique:
- Position countertop with slight overlap at wall
- Use compass to mark wall contour onto countertop
- Cut along marked line for perfect fit
- Cabinet Height Variations:
- Minor variations (under 1/8 inch): Can be addressed with shims under countertop
- Major variations: Require cabinet adjustment or leveling compound
- Countertop Leveling: Use leveling compound or thin plywood sheets to create level surface
Moisture Barriers and Preparations
- Moisture Barrier Installation: Apply adhesive-backed aluminum foil or waterproof membrane over cabinet tops
- Sink Area Protection: Apply water-resistant coating or flashing around sink cutout areas
- Dishwasher Shield: Install reflective insulation above dishwasher to protect countertop from heat and moisture
- Sealing Exposed Cabinet Edges: Apply waterproof sealant to any exposed particle board edges
- Support Strips: Install 1×2 support strips around perimeter of cabinets for countertop attachment
- Clean Surface Preparation: Thoroughly clean cabinet tops of dust, debris, and old adhesive
- Pre-Installation Acclimation: Allow wood countertop materials to acclimate to room conditions for 48-72 hours
Step-by-Step DIY Countertop Installation Guide
Cutting and Fitting Countertop Materials
- Preparation and Layout:
- Lay out countertop material on a flat, protected work surface
- Transfer measurements or templates to material, marking clearly
- Double-check all measurements before cutting
- Cutting Techniques:
- Use a circular saw with appropriate blade for straight cuts
- Use a jigsaw for curved cuts and internal cutouts
- Always cut with material face-up for laminate, face-down for solid surfaces
- Edge Treatment:
- Apply edge banding or trim to exposed edges
- Sand edges to smooth finish, progressing through finer grits
- Test Fitting:
- Dry fit all pieces in place before final installation
- Check for level and proper overhang
- Verify seams align properly
- Final Adjustments:
- Mark and make any necessary adjustments
- Sand or file edges for perfect fit
- Prepare for permanent installation
Material-Specific Installation Techniques
Laminate Countertops
- Apply contact cement to both cabinet tops and countertop undersides
- Allow adhesive to become tacky (typically 15-30 minutes)
- Position dowels across cabinets to prevent immediate adhesion
- Carefully lower countertop into position
- Remove dowels one by one, pressing firmly as you go
- Roll entire surface with J-roller to ensure complete adhesion
- Install backsplash using same technique
Butcher Block/Wood Countertops
- Apply thin bead of silicone caulk to cabinet tops
- Position countertop on cabinets
- Secure from underneath using mounting screws through cabinet corner braces
- Use elongated holes or clips to allow for wood movement
- Apply food-safe oil or sealer according to manufacturer directions
- Allow proper curing time before use
Tile Countertops
- Install cement board substrate, securing to cabinets
- Apply thin-set mortar with notched trowel
- Lay tiles in planned pattern, using spacers for consistent grout lines
- Allow proper setting time (typically 24 hours)
- Apply grout, working in small sections
- Clean excess grout after initial set
- Apply grout sealer after full cure (typically 72 hours)
Concrete Countertops
- Build forms according to measurements, using melamine or similar non-porous material
- Mix concrete according to manufacturer specifications
- Pour in layers, incorporating reinforcement mesh
- Vibrate to remove air bubbles
- Allow to cure according to manufacturer directions (typically 7-28 days)
- Remove forms and polish/finish as desired
- Apply appropriate sealer
Handling Seams and Joints
- Seam Placement Planning:
- Locate seams over cabinet supports, never over open spaces
- Position seams away from sink areas and heavy use zones
- Use miter joints for corners when possible for better appearance
- Proper Alignment:
- Use biscuits or splines for alignment in wood or laminate
- Use seam setter tools to draw sections together and level surfaces
- Seam Adhesive Application:
- Use appropriate adhesive for material (epoxy for stone, wood glue for butcher block)
- Apply in thin, even layer
- Clean excess immediately with appropriate solvent
- Seam Finishing:
- Allow adhesive to fully cure before finishing
- Sand seams flush with surrounding material
- Fill any voids with color-matched filler
- Polish to match surrounding finish
Backsplash and Edge Treatment Installation
- Backsplash Options:
- Integral backsplash: Installed with countertop
- Separate backsplash: Installed after countertop
- Tile backsplash: Requires separate installation process
- Backsplash Installation:
- Apply adhesive appropriate for materials
- Press firmly into place
- Secure with temporary bracing if needed
- Edge Treatment Options:
- Built-in edge (part of countertop)
- Applied edge (added after installation)
- Metal or wood trim edges
- Edge Installation:
- Secure with appropriate adhesive
- Clamp until set
- Sand or finish to blend with countertop
Common Installation Mistakes and Solutions
- Improper Measuring: Double-check all measurements before cutting
- Insufficient Support: Install additional bracing before placing heavy countertops
- Poor Seam Alignment: Use proper joining techniques and specialized tools
- Rushed Adhesive Application: Follow manufacturer’s timing recommendations precisely
- Improper Tool Selection: Use the right blade/bit for the material being cut
- Ignoring Material Properties: Account for wood expansion or concrete curing requirements
- Skipping the Dry Fit: Always test fit before applying adhesives
- Inadequate Surface Preparation: Ensure all surfaces are clean, dry, and properly prepared
- Overtightening Fasteners: Use careful technique to prevent cracking or splitting
- Improper Sealing: Apply appropriate sealer for the material and intended use
Finishing Touches: Sealing and Protecting Your New Countertops
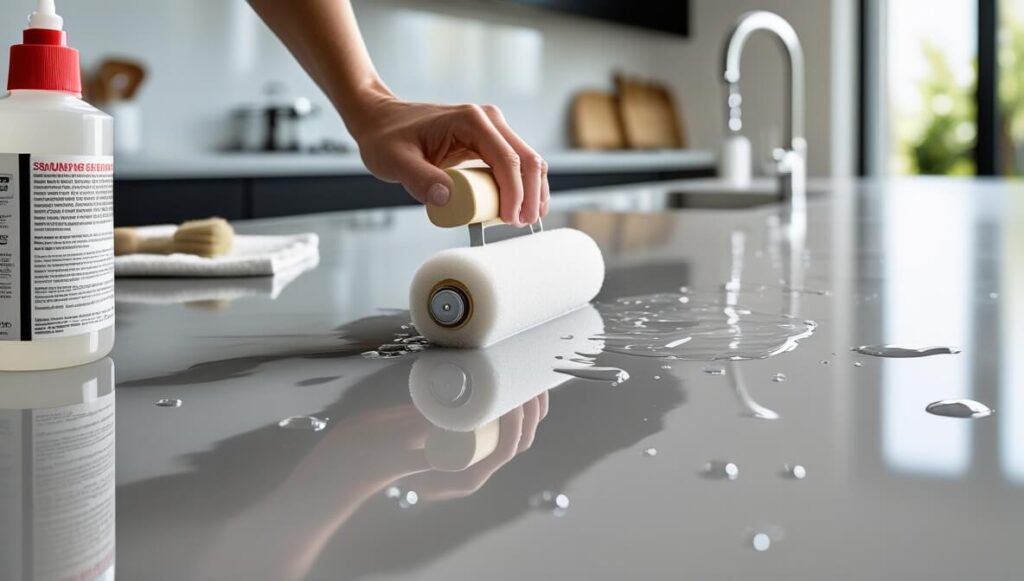
Material-Specific Sealing Requirements
Laminate
- Sealing Needs: Minimal – laminate is non-porous
- Edge Sealing: Apply silicone caulk at wall joints and around sink
- Maintenance Sealing: Not required
Butcher Block/Wood
- Initial Sealing: Apply food-safe mineral oil or beeswax blend
- Application Method: Apply generously, allow to soak in (15-20 minutes), wipe excess
- Curing Time: 24 hours before light use
- Maintenance Schedule: Reapply every 1-3 months depending on use
Tile
- Grout Sealing: Apply penetrating grout sealer with small brush or applicator bottle
- Tile Sealing: Apply stone sealer if using natural stone tiles
- Application Method: Wipe on, allow to penetrate (10-15 minutes), wipe excess
- Curing Time: 24-48 hours
- Maintenance Schedule: Reseal grout annually
Concrete
- Initial Sealing: Apply food-safe concrete sealer (acrylic, epoxy, or penetrating)
- Application Method: Follow manufacturer directions – typically multiple thin coats
- Curing Time: 48-72 hours before use
- Maintenance Schedule: Reseal every 1-3 years depending on use and sealer type
Solid Surface
- Sealing Needs: None – material is non-porous
- Final Finish: Polish with manufacturer-recommended products
- Maintenance: Regular cleaning only
Sink and Faucet Installation
- Sink Installation Steps:
- Apply bead of silicone around sink opening
- Place sink in opening
- Secure with mounting clips from underneath
- Wipe away excess silicone
- Allow to set 24 hours before connecting plumbing
- Undermount Sink Specific Steps:
- Install sink before countertop if possible
- Use specialty adhesive and mounting hardware
- Support sink weight during adhesive cure
- Faucet Installation:
- Insert faucet through pre-drilled holes
- Secure with mounting hardware from underneath
- Install supply lines to hot and cold connections
- Check for leaks after connecting water supply
- Disposal Reinstallation:
- Mount disposal flange to sink
- Connect disposal unit to flange
- Connect plumbing and electrical
- Test for proper operation
Caulking and Trim Work
- Caulk Selection:
- Silicone for water-prone areas (sink, backsplash)
- Latex for less critical areas
- Color-matched caulk for visible areas
- Proper Caulking Technique:
- Clean surfaces thoroughly
- Cut caulk tube at 45-degree angle for appropriate bead size
- Apply steady, even pressure
- Smooth with wet finger or caulking tool
- Remove masking tape before caulk sets
- Trim Installation:
- Measure and cut trim pieces precisely
- Secure with adhesive appropriate for materials
- Fill nail holes with color-matched filler
- Sand and finish to match surrounding surfaces
- Edge Detail Finishing:
- Sand edges progressively through finer grits
- Round over sharp corners slightly for safety
- Apply final finish to match countertop
First Cleaning and Maintenance
- Initial Cleaning:
- Remove all installation debris
- Wipe down with appropriate cleaner for material
- Remove any adhesive residue with recommended solvent
- Buff dry with soft, lint-free cloth
- Material-Specific First Cleaning:
- Laminate: Mild soap and water
- Wood: Damp cloth only, no standing water
- Tile: Non-acidic cleaner safe for grout
- Concrete: pH-neutral cleaner
- Solid Surface: Manufacturer recommended cleaner
- Stain Protection Measures:
- Use cutting boards for food preparation
- Place trivets under hot items
- Clean spills immediately, especially on porous surfaces
- Use coasters under beverages
- Maintenance Schedule Creation:
- Create calendar reminders for periodic resealing
- Document recommended cleaning products
- Establish regular maintenance routine
Curing Times Before Full Use
- Laminate Countertops:
- Light use: Immediate
- Full use: 24 hours after installation
- Caulk cure: 24 hours before water exposure
- Butcher Block/Wood Countertops:
- Light use: 24 hours after final oil application
- Food preparation: 72 hours after final oil application
- Oil reapplication: Weekly for first month
- Tile Countertops:
- Light use: 24 hours after installation
- Full use: After grout has cured (typically 72 hours)
- Sealer cure: 24-48 hours
- Concrete Countertops:
- Initial cure: 7 days minimum before sealing
- Sealer cure: According to manufacturer (typically 48-72 hours)
- Full use: 7-10 days after sealing
- Solid Surface Countertops:
- Adhesive cure: 24 hours
- Full use: 24-48 hours after installation
- Normal cleaning: Immediate
Troubleshooting Common DIY Countertop Replacement Issues
Uneven Cuts or Misalignments
- Visible Gaps at Walls:
- Small gaps (under 1/4 inch): Fill with color-matched caulk
- Larger gaps: Install scribe molding or backsplash to cover
- Prevention: Use wall contour gauge for perfect fit
- Uneven Seam Height:
- Sand higher side carefully to match lower side
- Use appropriate filler to build up lower side if needed
- Polish entire area to blend transition
- Prevention: Use seam leveling tools during installation
- Seam Color Mismatch:
- Use color-matched filler or tinted epoxy
- Apply thin layers, building up as needed
- Sand and polish to match surrounding finish
- Consider professional color matching kits
- Seam Cracking:
- Clean crack thoroughly
- Fill with appropriate adhesive for material
- Reinforce from underneath if possible
- Prevention: Ensure proper support under all seams
Minor Damage Remedies
- Laminate Countertops:
- Small chips: Fill with color-matched laminate repair paste
- Scratches: Use laminate repair marker in matching color
- Burns: Sand lightly and apply heat-resistant finish
- Prevention: Always use cutting boards and trivets
- Wood Countertops:
- Scratches: Sand lightly and reapply oil/finish
- Dents: Steam with damp cloth and iron to raise grain
- Water rings: Sand lightly and reapply finish
- Prevention: Regular oiling and immediate spill cleanup
- Tile Countertops:
- Cracked tile: Remove and replace individual tile
- Chipped tile: Fill with epoxy or tile repair kit
- Stained grout: Clean with oxygen bleach solution
- Prevention: Regular grout sealing and prompt spill cleanup
- Concrete Countertops:
- Hairline cracks: Fill with tinted epoxy
- Chips: Patch with concrete repair product
- Stains: Poultice with baking soda paste
- Prevention: Proper sealing and immediate spill cleanup
- Solid Surface Countertops:
- Light scratches: Buff with fine abrasive pad
- Deep scratches: Sand progressively with finer grits
- Chips: Fill with manufacturer repair kit
- Prevention: Use cutting boards and avoid dragging items
Plumbing and Electrical Challenges
- Misaligned Sink Cutout:
- Small misalignment: Adjust sink position if possible
- Larger misalignment: Enlarge cutout carefully
- Significant error: Consider decorative rim to cover gap
- Plumbing Clearance Issues:
- Reroute pipes if accessible
- Use flexible connectors where appropriate
- Modify cabinet interior to accommodate plumbing
- Electrical Outlet Interference:
- Relocate outlet if possible
- Extend electrical box to be flush with new countertop
- Install recessed outlets designed for countertop applications
- Dishwasher Clearance Problems:
- Adjust dishwasher height if possible
- Modify mounting brackets
- Consider slight countertop modification above dishwasher
- Range/Cooktop Fitment:
- Ensure proper clearance per manufacturer specifications
- Adjust cutout dimensions carefully if needed
- Use heat-resistant tape around edges of cutout
When to Call Professional Help
- Complex Plumbing Modifications:
- Any major rerouting of supply or drain lines
- Gas line modifications for cooktops
- When access is severely limited
- Electrical Issues:
- Any new wiring or circuit modifications
- Relocating outlets or switches
- Installing new electrical components
- Structural Concerns:
- Signs of water damage to subflooring
- Cabinet structural integrity issues
- Support requirements for extremely heavy countertops
- Material-Specific Challenges:
- Precise stone cutting for natural stone
- Complex concrete pours
- Custom edge treatments requiring specialized tools
- Installation Rescue:
- Major cutting errors
- Significant misalignments
- Material failure during installation
Maintenance Tips to Extend the Life of Your DIY Countertops
Material-Specific Cleaning Guidelines
Laminate Countertops
- Daily Cleaning: Wipe with damp cloth and mild dish soap
- Stain Removal: Baking soda paste for tough stains, rinse thoroughly
- Disinfecting: Diluted bleach solution (1 tablespoon per gallon of water)
- Avoid: Abrasive cleaners, steel wool, excessive water exposure
- Protection: Use cutting boards, trivets for hot items, clean spills immediately
Wood/Butcher Block Countertops
- Daily Cleaning: Wipe with damp cloth, mild soap if needed
- Stain Removal: Lemon juice and salt for light stains, sand deeper stains
- Disinfecting: White vinegar spray, allow to air dry
- Avoid: Standing water, harsh chemicals, bleach
- Protection: Regular oil applications, immediate drying after cleaning
Tile Countertops
- Daily Cleaning: Mild cleaner safe for both tile and grout
- Grout Cleaning: Oxygen bleach solution for stained grout
- Disinfecting: Hydrogen peroxide spray
- Avoid: Acidic cleaners on natural stone tiles, harsh scrubbing on grout
- Protection: Annual grout sealing, use cutting boards and trivets
Concrete Countertops
- Daily Cleaning: pH-neutral cleaner with soft cloth
- Stain Removal: Poultice method with baking soda paste
- Disinfecting: Mild soap solution only
- Avoid: Acidic cleaners, abrasive scrubbers, ammonia products
- Protection: Regular resealing, coasters under glasses, immediate spill cleanup
Solid Surface Countertops
- Daily Cleaning: Soap and water or dedicated solid surface cleaner
- Stain Removal: Non-abrasive cleaner with ammonia (check manufacturer guidelines)
- Disinfecting: Diluted bleach solution (check manufacturer approval)
- Avoid: Harsh chemicals, high heat exposure
- Protection: Use cutting boards and trivets, avoid sliding rough objects
Preventative Maintenance Schedule
Weekly Maintenance
- All Countertops: Thorough cleaning with appropriate cleaner
- Wood Countertops: Check for dry areas that may need spot oiling
- Tile Countertops: Check for loose grout or tiles
- Inspect Seams: Check all seams for separation or damage
- Check Caulking: Inspect caulk around sinks and backsplashes
Monthly Maintenance
- Laminate: Check edges for peeling or damage
- Wood: Full mineral oil application
- Tile: Clean grout with appropriate cleaner
- Concrete: Check for seal effectiveness (water should bead up)
- Solid Surface: Deep clean with manufacturer-recommended products
Quarterly Maintenance
- All Types: Inspect for damage, stains, or wear patterns
- Check Support: Verify cabinet support remains adequate
- Sink Examination: Check sink mounting and seals
- Faucet Inspection: Check for leaks or loose connections
- Seam Evaluation: Assess all seams for stability and appearance
Annual Maintenance
- Laminate: Reseal around sinks and edges
- Wood: Deep clean and heavy oil application
- Tile: Reseal grout completely
- Concrete: Apply fresh sealer coat
- Solid Surface: Professional polish if needed
- All Types: Detailed inspection for structural issues
Minor Damage Repair Guidance
Surface Scratches
- Laminate: Cover with color-matched marker or wax stick
- Wood: Sand lightly with fine grit, apply oil
- Tile: Polish surface with appropriate compound
- Concrete: Apply thin layer of sealer
- Solid Surface: Buff with fine abrasive pad
Deeper Scratches and Gouges
- Laminate: Fill with repair paste, level, color-match
- Wood: Fill with wood filler, sand smooth, apply finish
- Tile: Replace individual tile if severely damaged
- Concrete: Patch with tinted concrete repair product
- Solid Surface: Sand progressively with finer grits
Stain Removal Techniques
- General Approach: Start with mildest method, progress to stronger
- Oil-Based Stains: Absorb with cornstarch or baking soda
- Organic Stains: Hydrogen peroxide or diluted bleach (where safe)
- Rust Stains: Lemon juice and salt (not on marble or limestone)
- Ink Stains: Isopropyl alcohol or acetone (test in inconspicuous area first)
- Stubborn Stains: Material-specific poultice applications
Edge and Seam Repairs
- Loose Edges: Reapply appropriate adhesive
- Chipped Edges: Fill with matching material, sand smooth
- Seam Separation: Clean thoroughly, apply new adhesive, clamp
- Seam Discoloration: Clean and apply color-matched sealer
Appearance and Functionality Preservation
Preventing Heat Damage
- **Always use trivets or hot pads under hot items
- **Maintain minimum distance between heat sources and countertop edges
- **Install heat reflection strips under countertop near ranges
- **Use splash guards to prevent hot grease contact
- **Choose appropriate materials for areas near cooking zones
Avoiding Water Damage
- **Promptly dry areas around sinks after use
- **Check faucet base and sink edges regularly for moisture
- **Use drain mats under dish drying areas
- **Ensure properly functioning sink overflow drains
- **Apply additional sealer to areas frequently exposed to water
Preventing Chemical Damage
- **Keep household cleaners in containers, not directly on countertops
- **Clean spills from acidic foods immediately (citrus, vinegar, wine)
- **Use appropriate cleaners for your specific countertop material
- **Store chemicals in another area, not on countertops
- **Use mats under containers that might leak (soap dispensers, oil bottles)
Maintaining Even Wear
- **Rotate common working areas to prevent uneven wear patterns
- **Use cutting boards in multiple locations, not just one spot
- **Avoid dragging rough-bottomed items across surfaces
- **Distribute heavy items rather than concentrating in one area
- **Apply protective treatments evenly across entire surface
Recommended Products and Avoidances
Recommended Products by Material Type
- Laminate:
- Recommended: Non-abrasive all-purpose cleaners
- Specialty products: Laminate repair kits, edge banding adhesive
- Natural alternatives: Vinegar and water solution
- Wood/Butcher Block:
- Recommended: Food-grade mineral oil, beeswax conditioner
- Specialty products: Howard Butcher Block Conditioner, Boos Block Board Cream
- Natural alternatives: Pure tung oil, fractionated coconut oil
- Tile:
- Recommended: pH-neutral tile cleaners
- Specialty products: Grout sealer, oxygen bleach for grout
- Natural alternatives: Baking soda paste for grout cleaning
- Concrete:
- Recommended: pH-neutral cleaners specifically for concrete
- Specialty products: Food-safe concrete sealers, concrete wax
- Natural alternatives: Castile soap solution for cleaning
- Solid Surface:
- Recommended: Non-abrasive cleaners, specialized solid surface products
- Specialty products: Manufacturer-specific polish kits
- Natural alternatives: Diluted vinegar for disinfecting (if approved by manufacturer)
Products to Avoid by Material Type
- Laminate:
- Avoid: Abrasive pads, bleach (except for disinfecting white laminate)
- Damaging chemicals: Acetone, strong solvents
- Problematic tools: Steel wool, sharp scrapers
- Wood/Butcher Block:
- Avoid: Dish soap (drying), any petroleum-based products
- Damaging chemicals: Bleach, ammonia, disinfecting wipes
- Problematic tools: Wire brushes, pressure washers
- Tile:
- Avoid: Acidic cleaners on natural stone, oil-based products on grout
- Damaging chemicals: Vinegar on marble or limestone
- Problematic tools: Stiff bristle brushes on grout
- Concrete:
- Avoid: Acidic cleaners, abrasive scrubbers
- Damaging chemicals: Vinegar, lemon juice, strong degreasers
- Problematic tools: Metal scrapers, high-pressure water
- Solid Surface:
- Avoid: Abrasive cleaners, harsh chemicals
- Damaging chemicals: Paint thinners, drain cleaners
- Problematic tools: Knives directly on surface, abrasive pads (except as directed for repairs)
Conclusion:
Congratulations! You now have all the knowledge you need to tackle your DIY countertop replacement project with confidence. By following the steps in this guide, you can transform your kitchen with beautiful new countertops while saving thousands of dollars in professional installation costs. Remember that patience is key—take your time with measurements and cuts, and don’t rush the process. Your attention to detail will pay off with professional-looking results that you can proudly show off to friends and family. Have you completed your DIY countertop replacement? We’d love to see your before-and-after photos! Share your experience in the comments below and inspire other DIY enthusiasts to transform their kitchens too! Countertop Surface.
By taking on this project yourself, you’re not just saving thousands of dollars in professional installation costs—you’re also gaining valuable home improvement skills and the immense satisfaction that comes from transforming your own living space. According to research from the National Association of Realtors, homeowners who complete DIY kitchen updates report a 93% satisfaction rate with their projects, and countertop replacements consistently rank among the most impactful changes you can make to your kitchen’s appearance and functionality.
- Minor unevenness: Sand high spots carefully
- Major unevenness: Consider shimming low areas from underneath
- Prevention: Use level frequently during installation
- Misaligned Seams:
- Minor misalignment: Sand carefully to blend
- Major misalignment: Consider adding decorative inlay to disguise
- Prevention: Use proper alignment tools during installation
- Irregular Cuts:
- Smooth with appropriate tool (sander, file, router)
- Use edge banding or molding to cover rough edges
- Prevention: Use cutting guides and appropriate saw blades
Seam Visibility Issues
- Visible Seam Lines:
- Fill hairline gaps with color-matched epoxy or filler
- Sand and polish to blend with surrounding surface
- Consider decorative metal inlay to make seam intentional feature
